Creator studio
Creating a neck label
FORMAT
Size: 6x3cm
Colour space: RGB
Artwork colour: Pantone Cool Gray 9
Line thickness: minimum 4pt
File: PDF
Background: None/Transparent
SETTING UP YOUR DOCUMENT
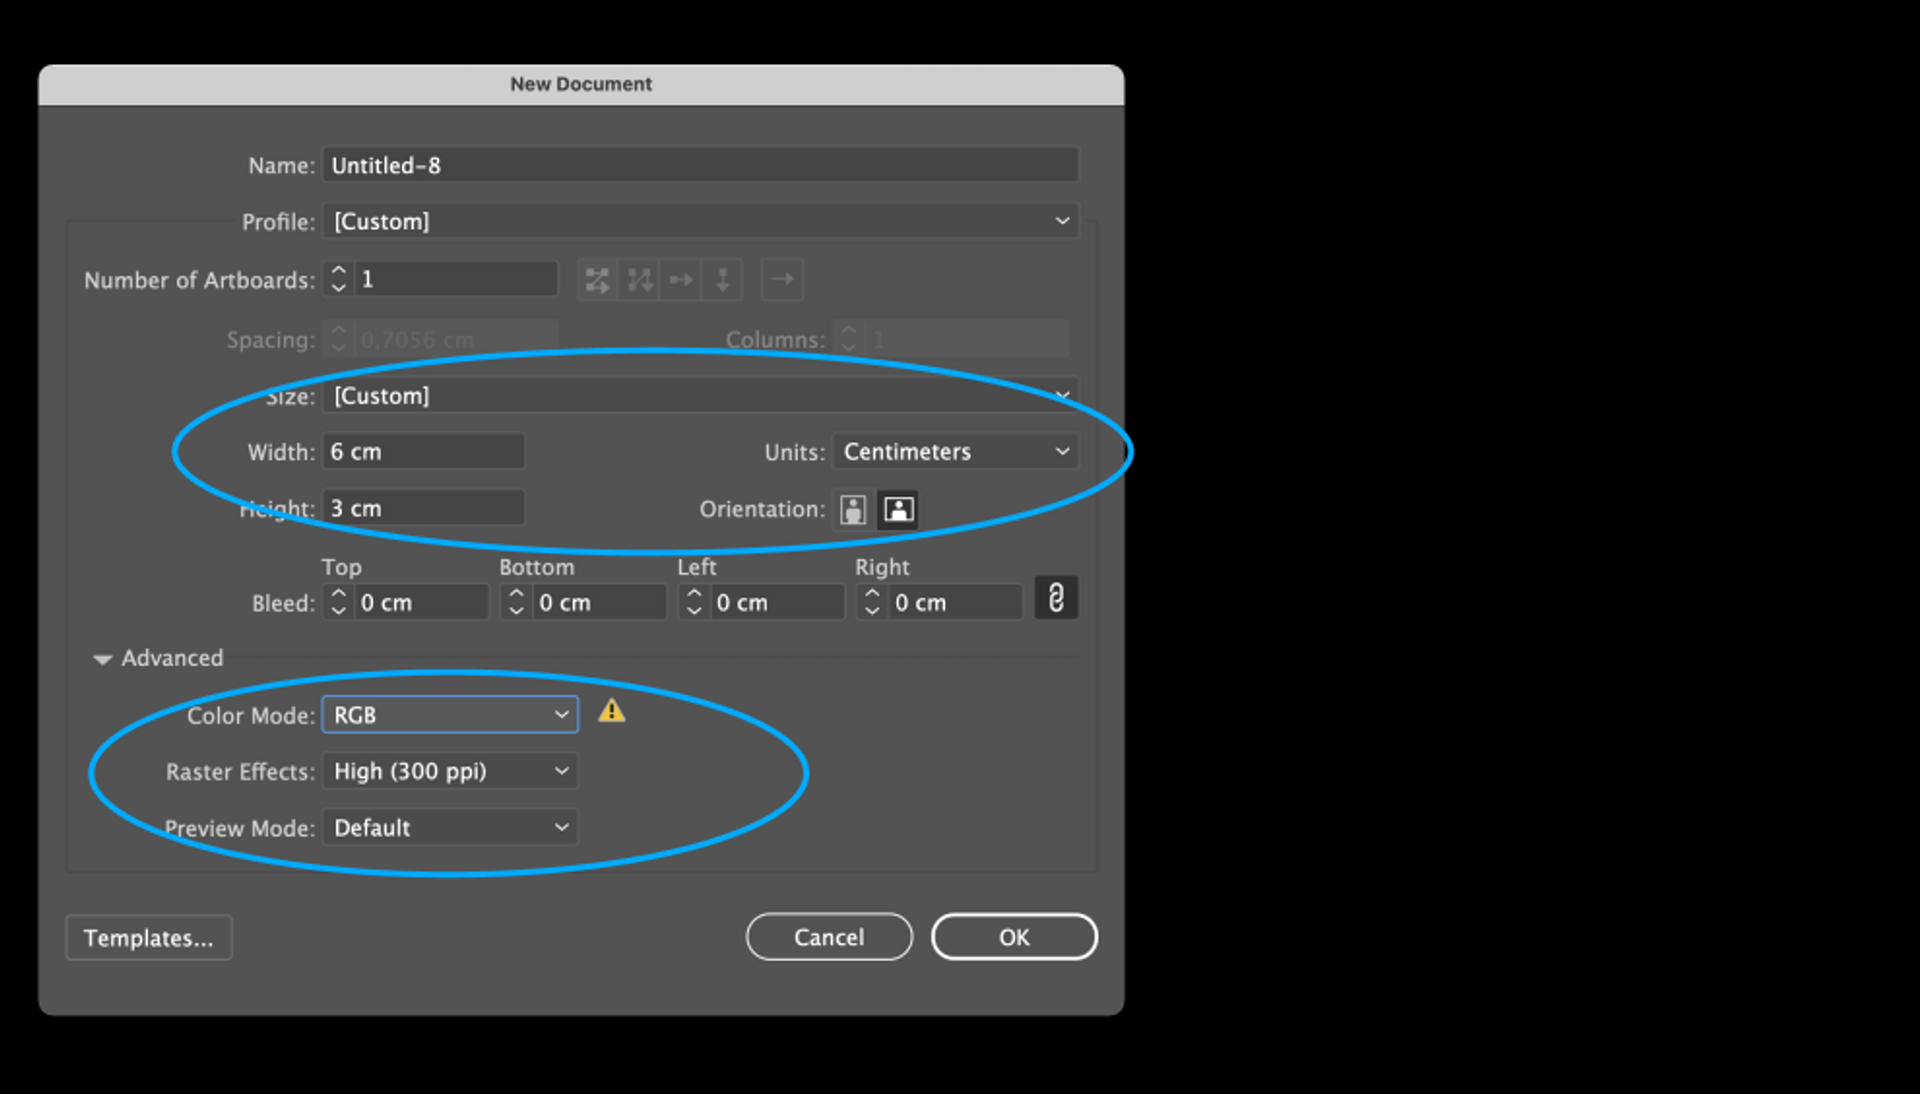
To begin, create a new document in Adobe Illustrator that is 6x3cm, with the colour mode RGB and 300 dpi resolution.
CONVERT TEXT TO OUTLINES
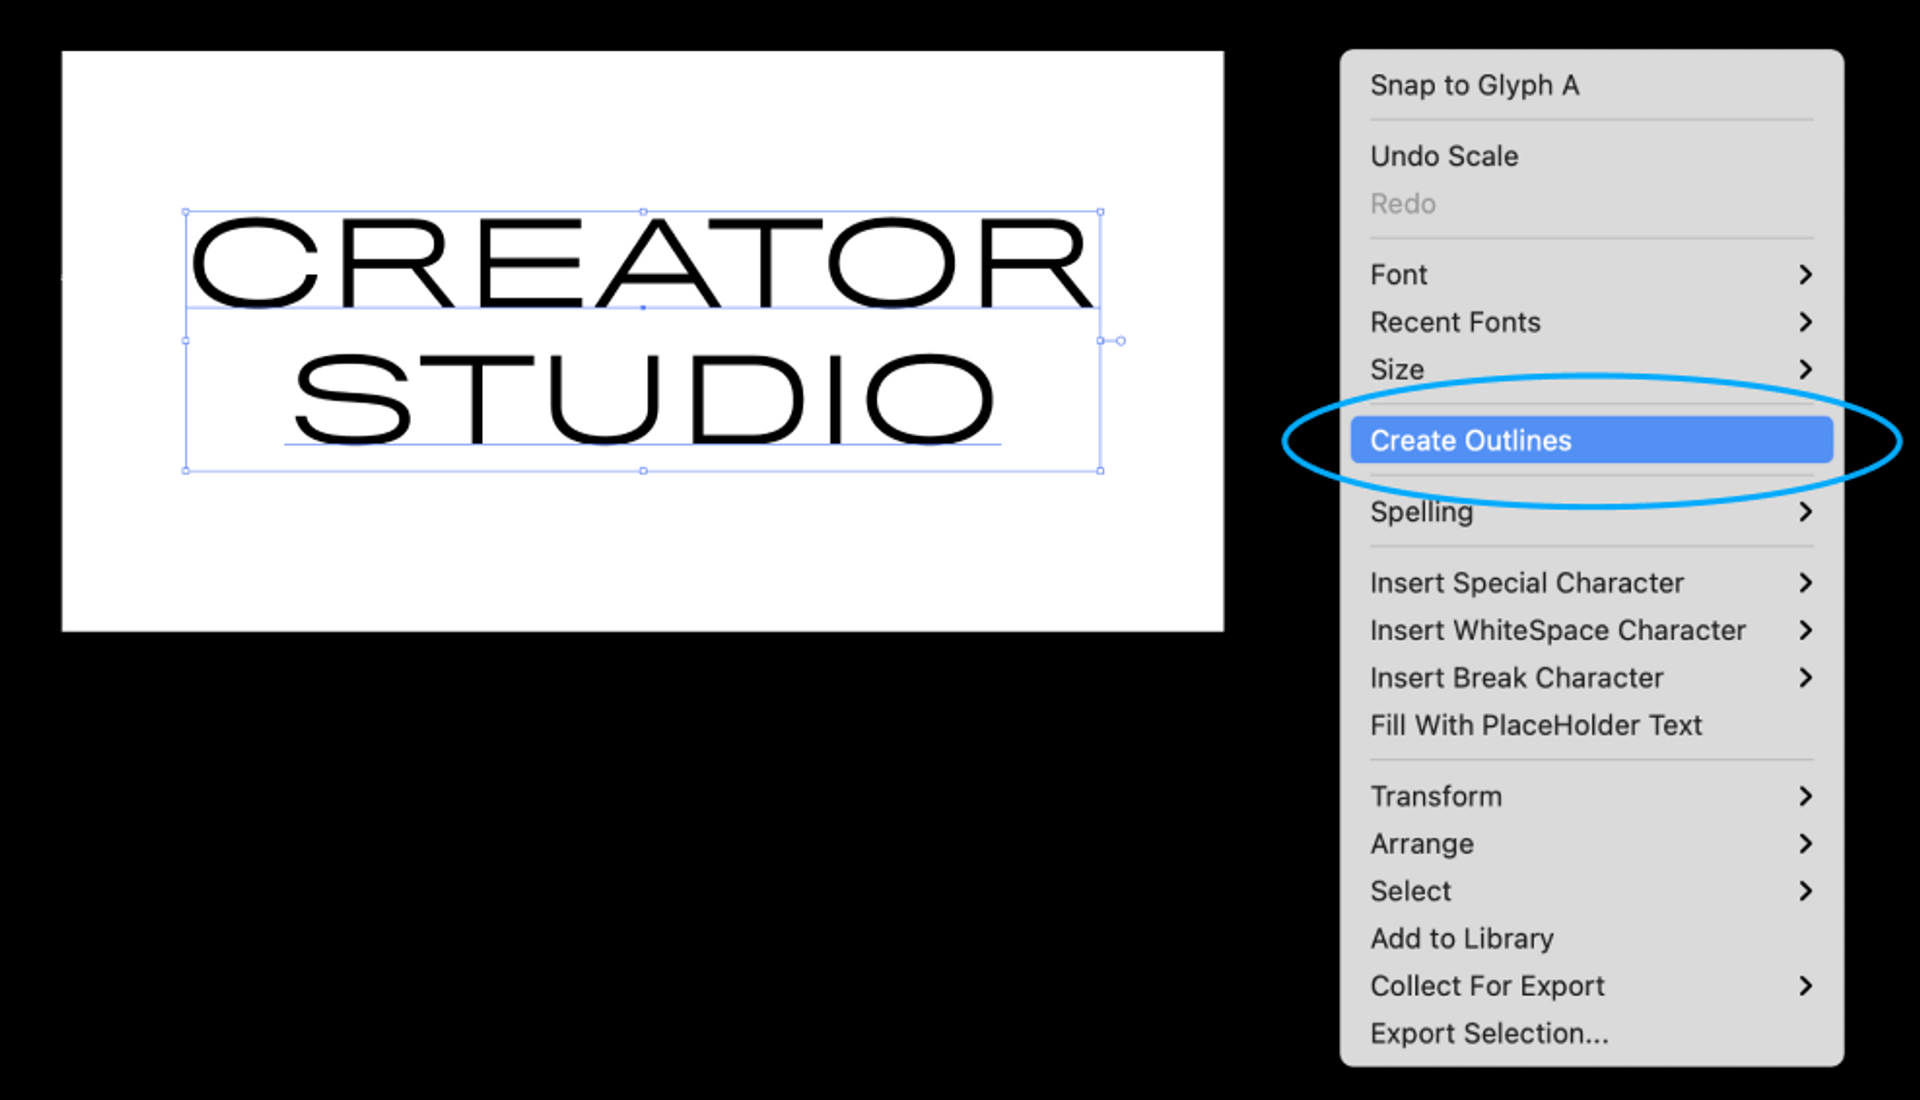
If you are using the text-tool to create your artwork, place it inside the artboard. When you are happy with the result, right click on it to pull up a menu. Click on “Create Outlines” from the right click menu options.

Your text block should now be outlined and look similar to this image.
APPLYING CORRECT COLOUR
After converting your text or artwork to outlines, you need to set the right colour space so it will work on all the garment colours in our merch apparel collections.
In Adobe Illustrator, go to menu option:
Window -> Swatch libraries -> Colour Books -> PANTONE+ Solid Coated
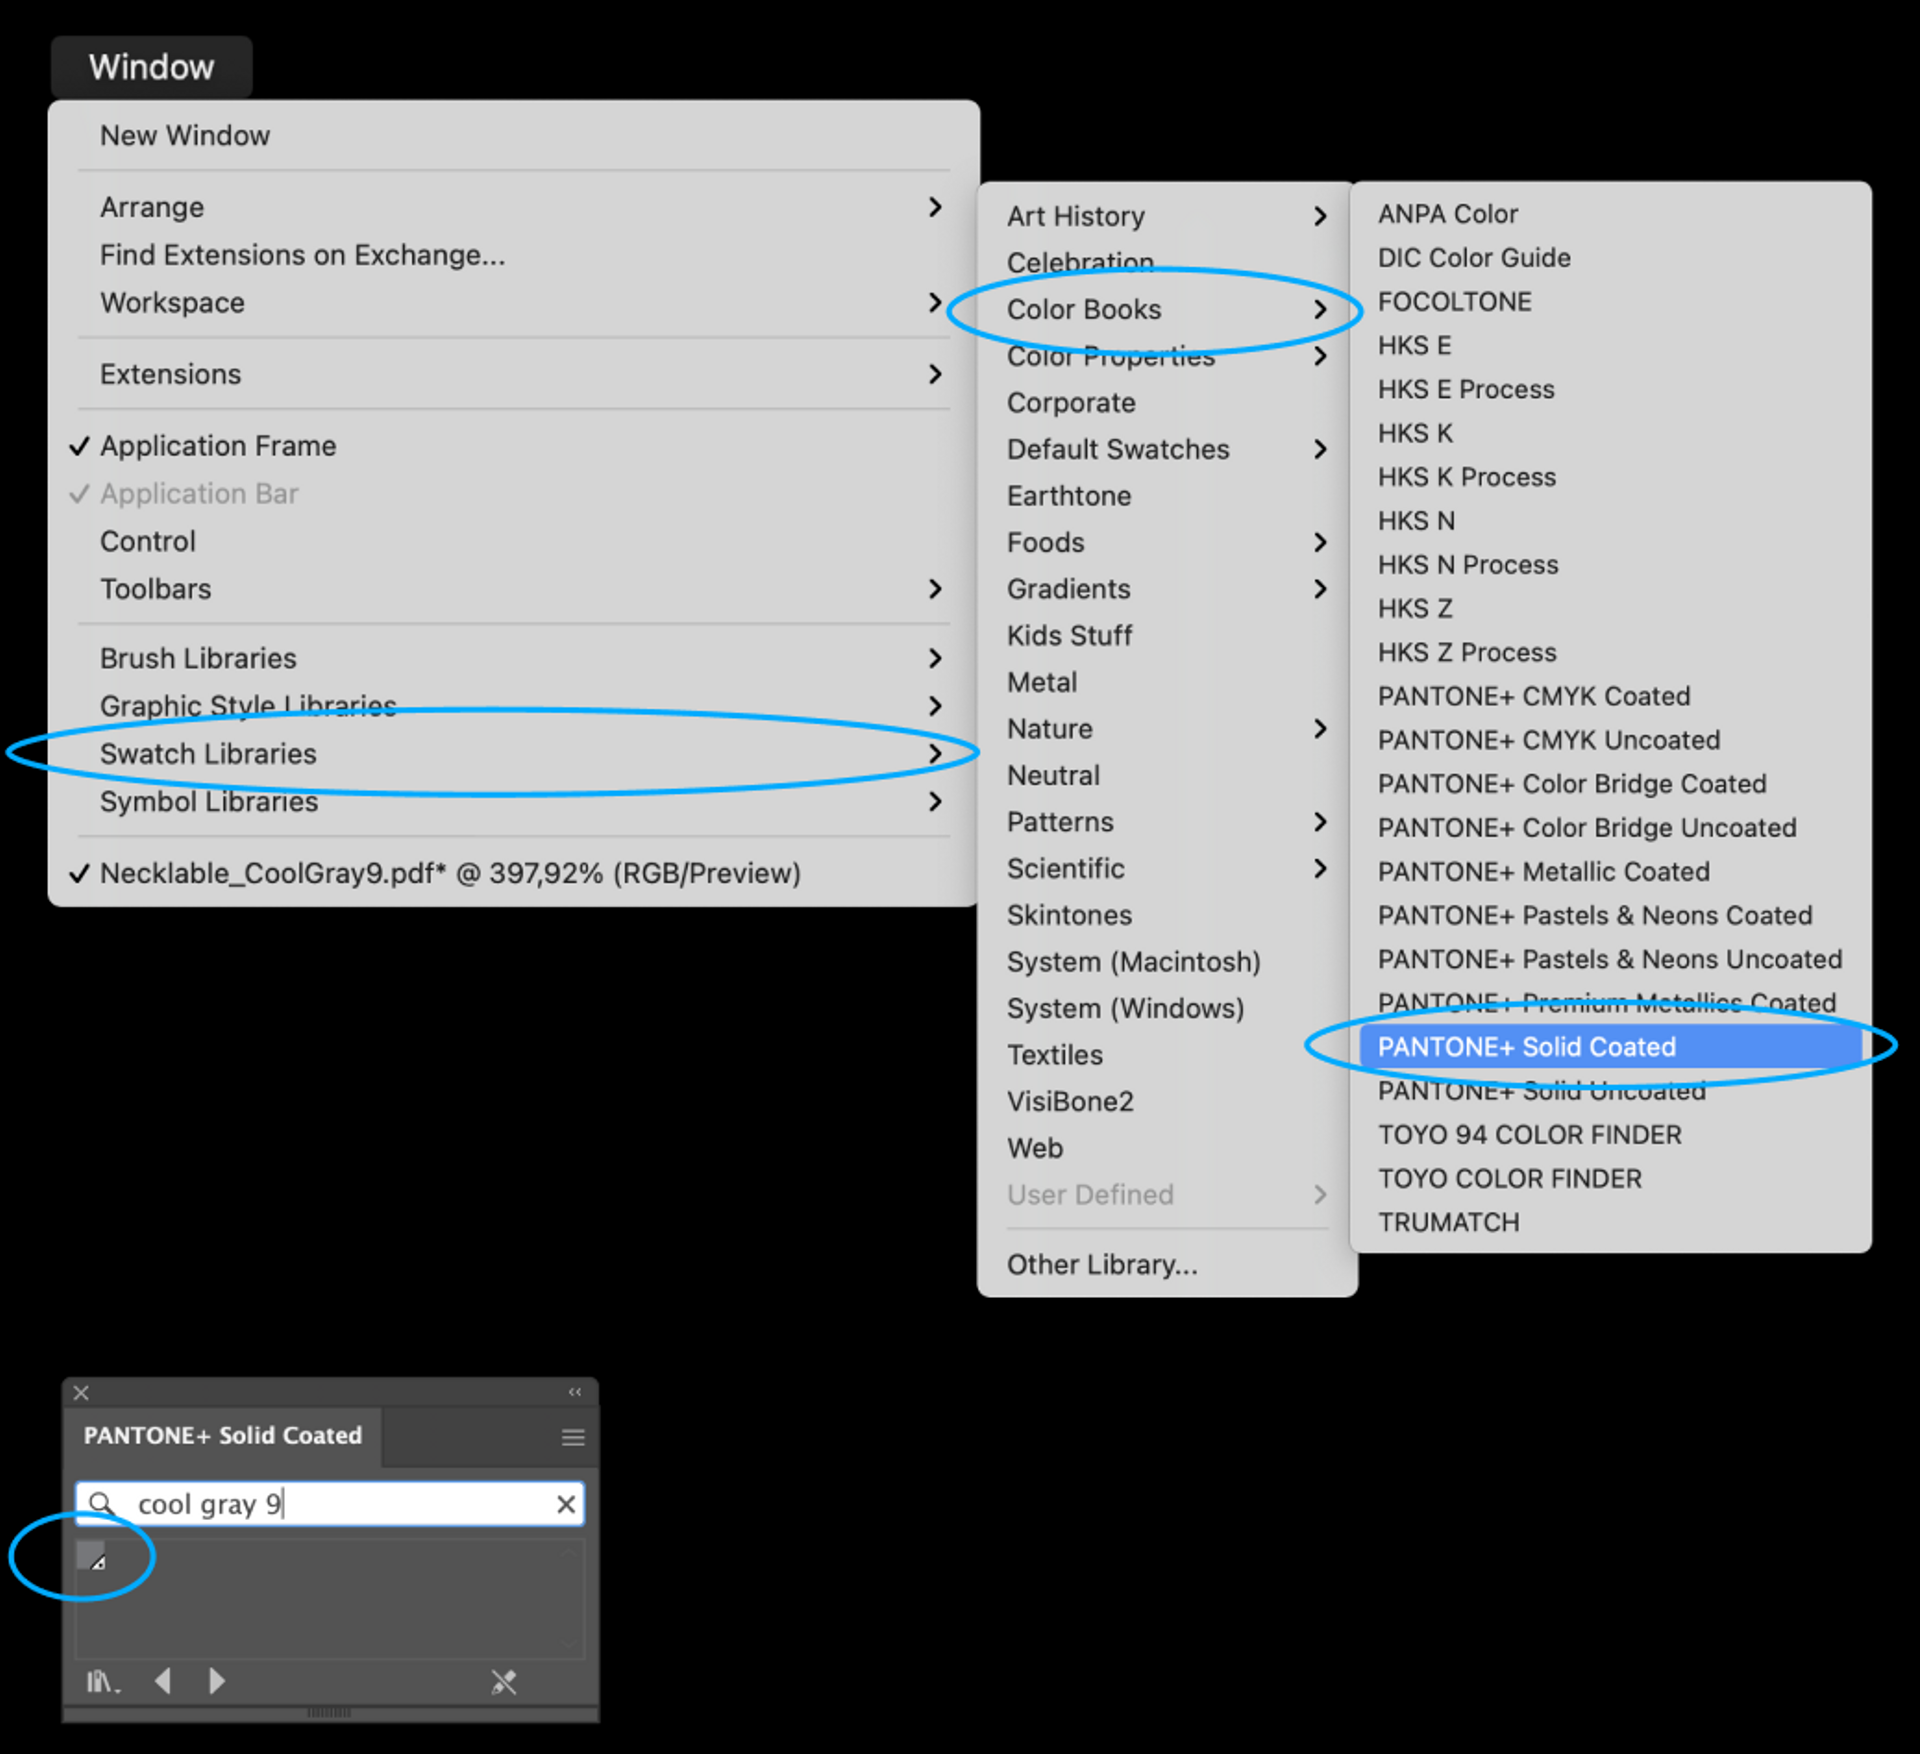
Now you will have a new panel open. In the search bar type: cool gray 9.
The search should result in just one colour option to select.

Select all your text and/or graphics.
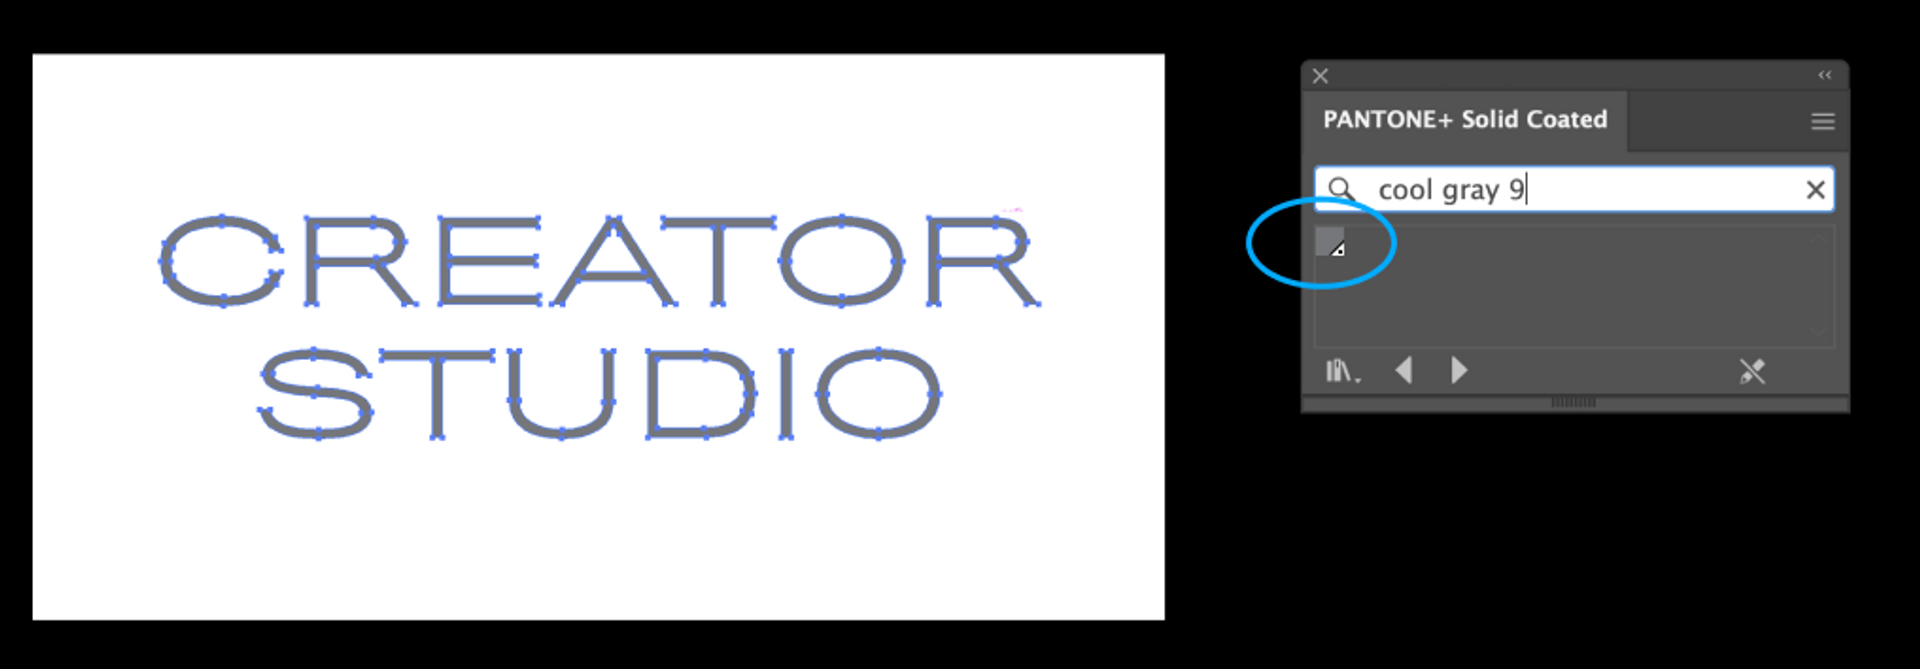
In the panel where you searched for Cool Gray 9, click on the gray colour icon and you will see that the selected graphics has changed to the PANTONE Cool Gray colour.
Save your document as a PDF file and you’re ready to import it into MyStudio as your custom neck label.
was this helpful?

© Creator Studio 2024 - Part of H&M Group