Creator studio
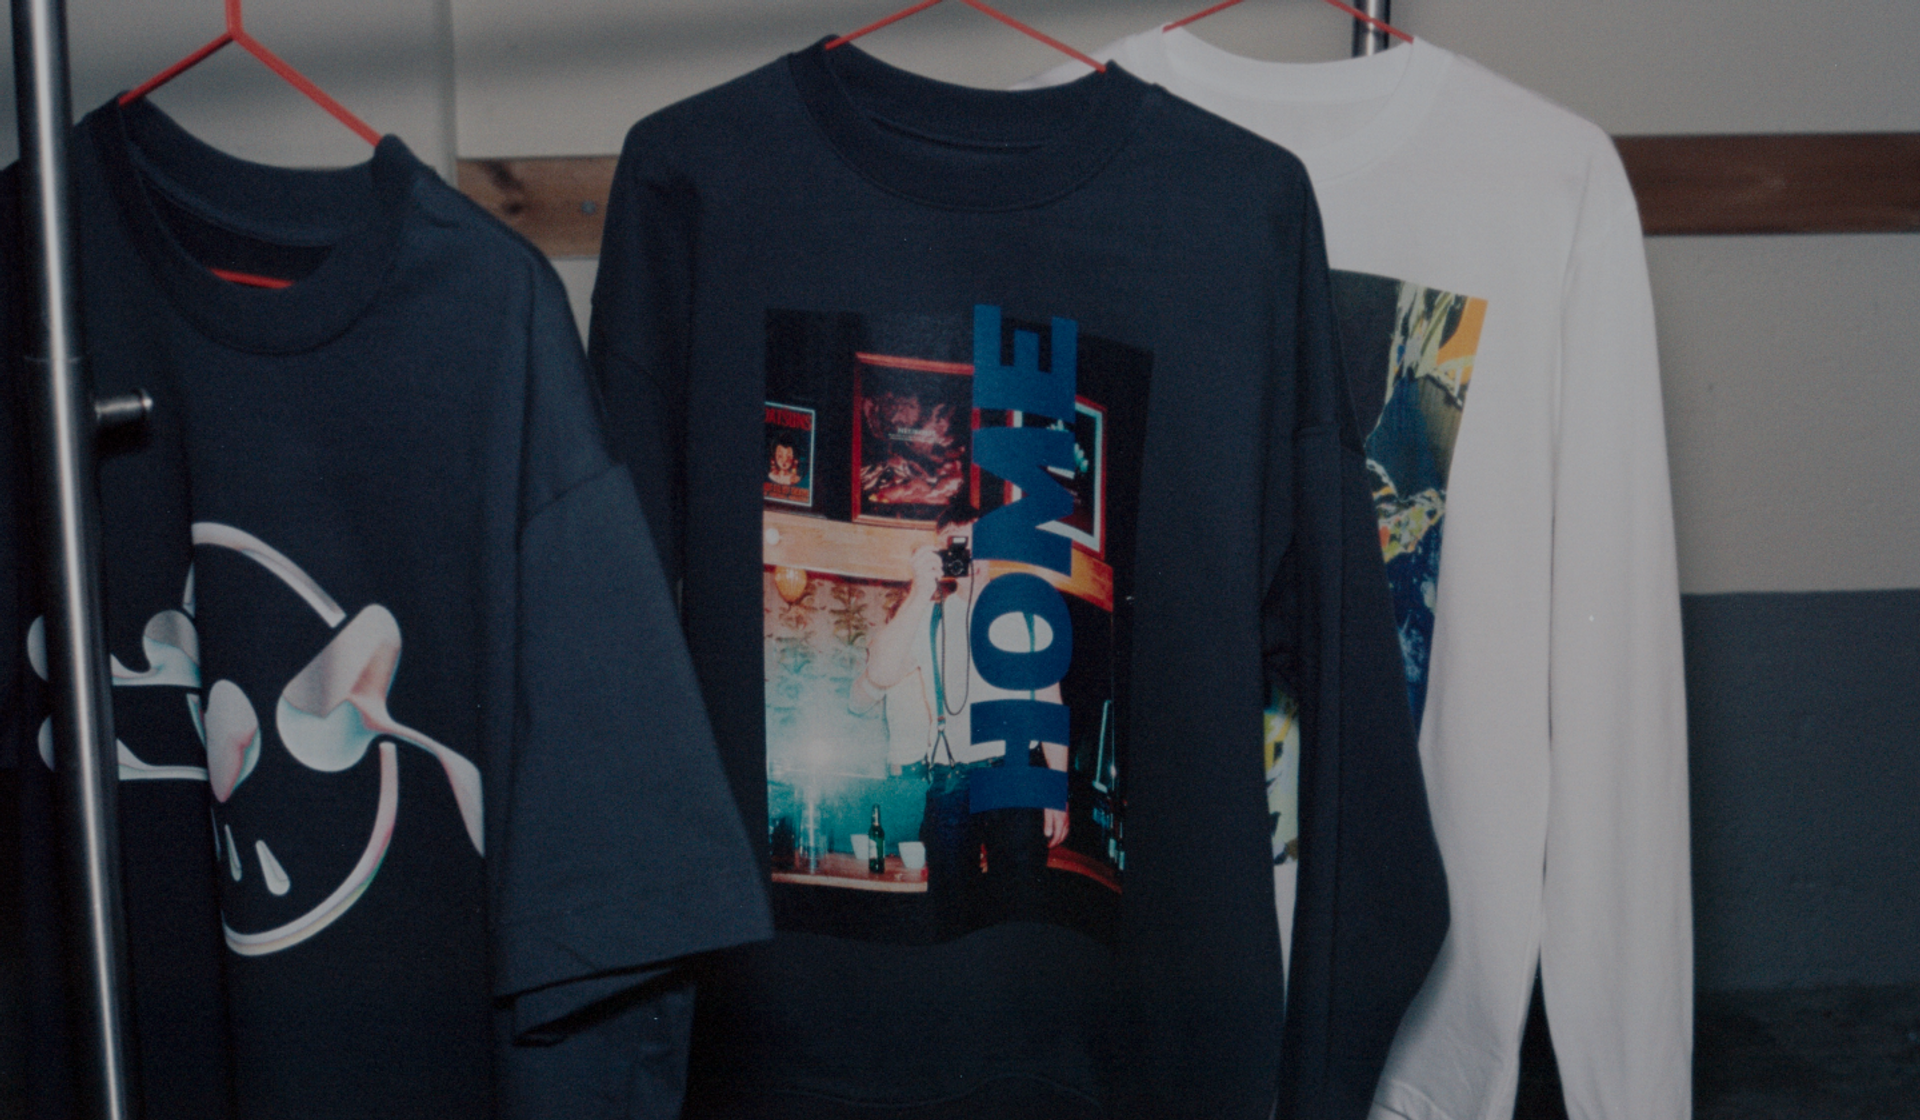
Creating a sticker with Adobe Illustrator
Custom packaging sticker is available for creators that registered their business with us on our platform. Read more about custom sticker and neck label >here<.
FORMAT
Size: 9x9cm
Colour space: RGB
File: PDF
SETTING UP YOUR DOCUMENT
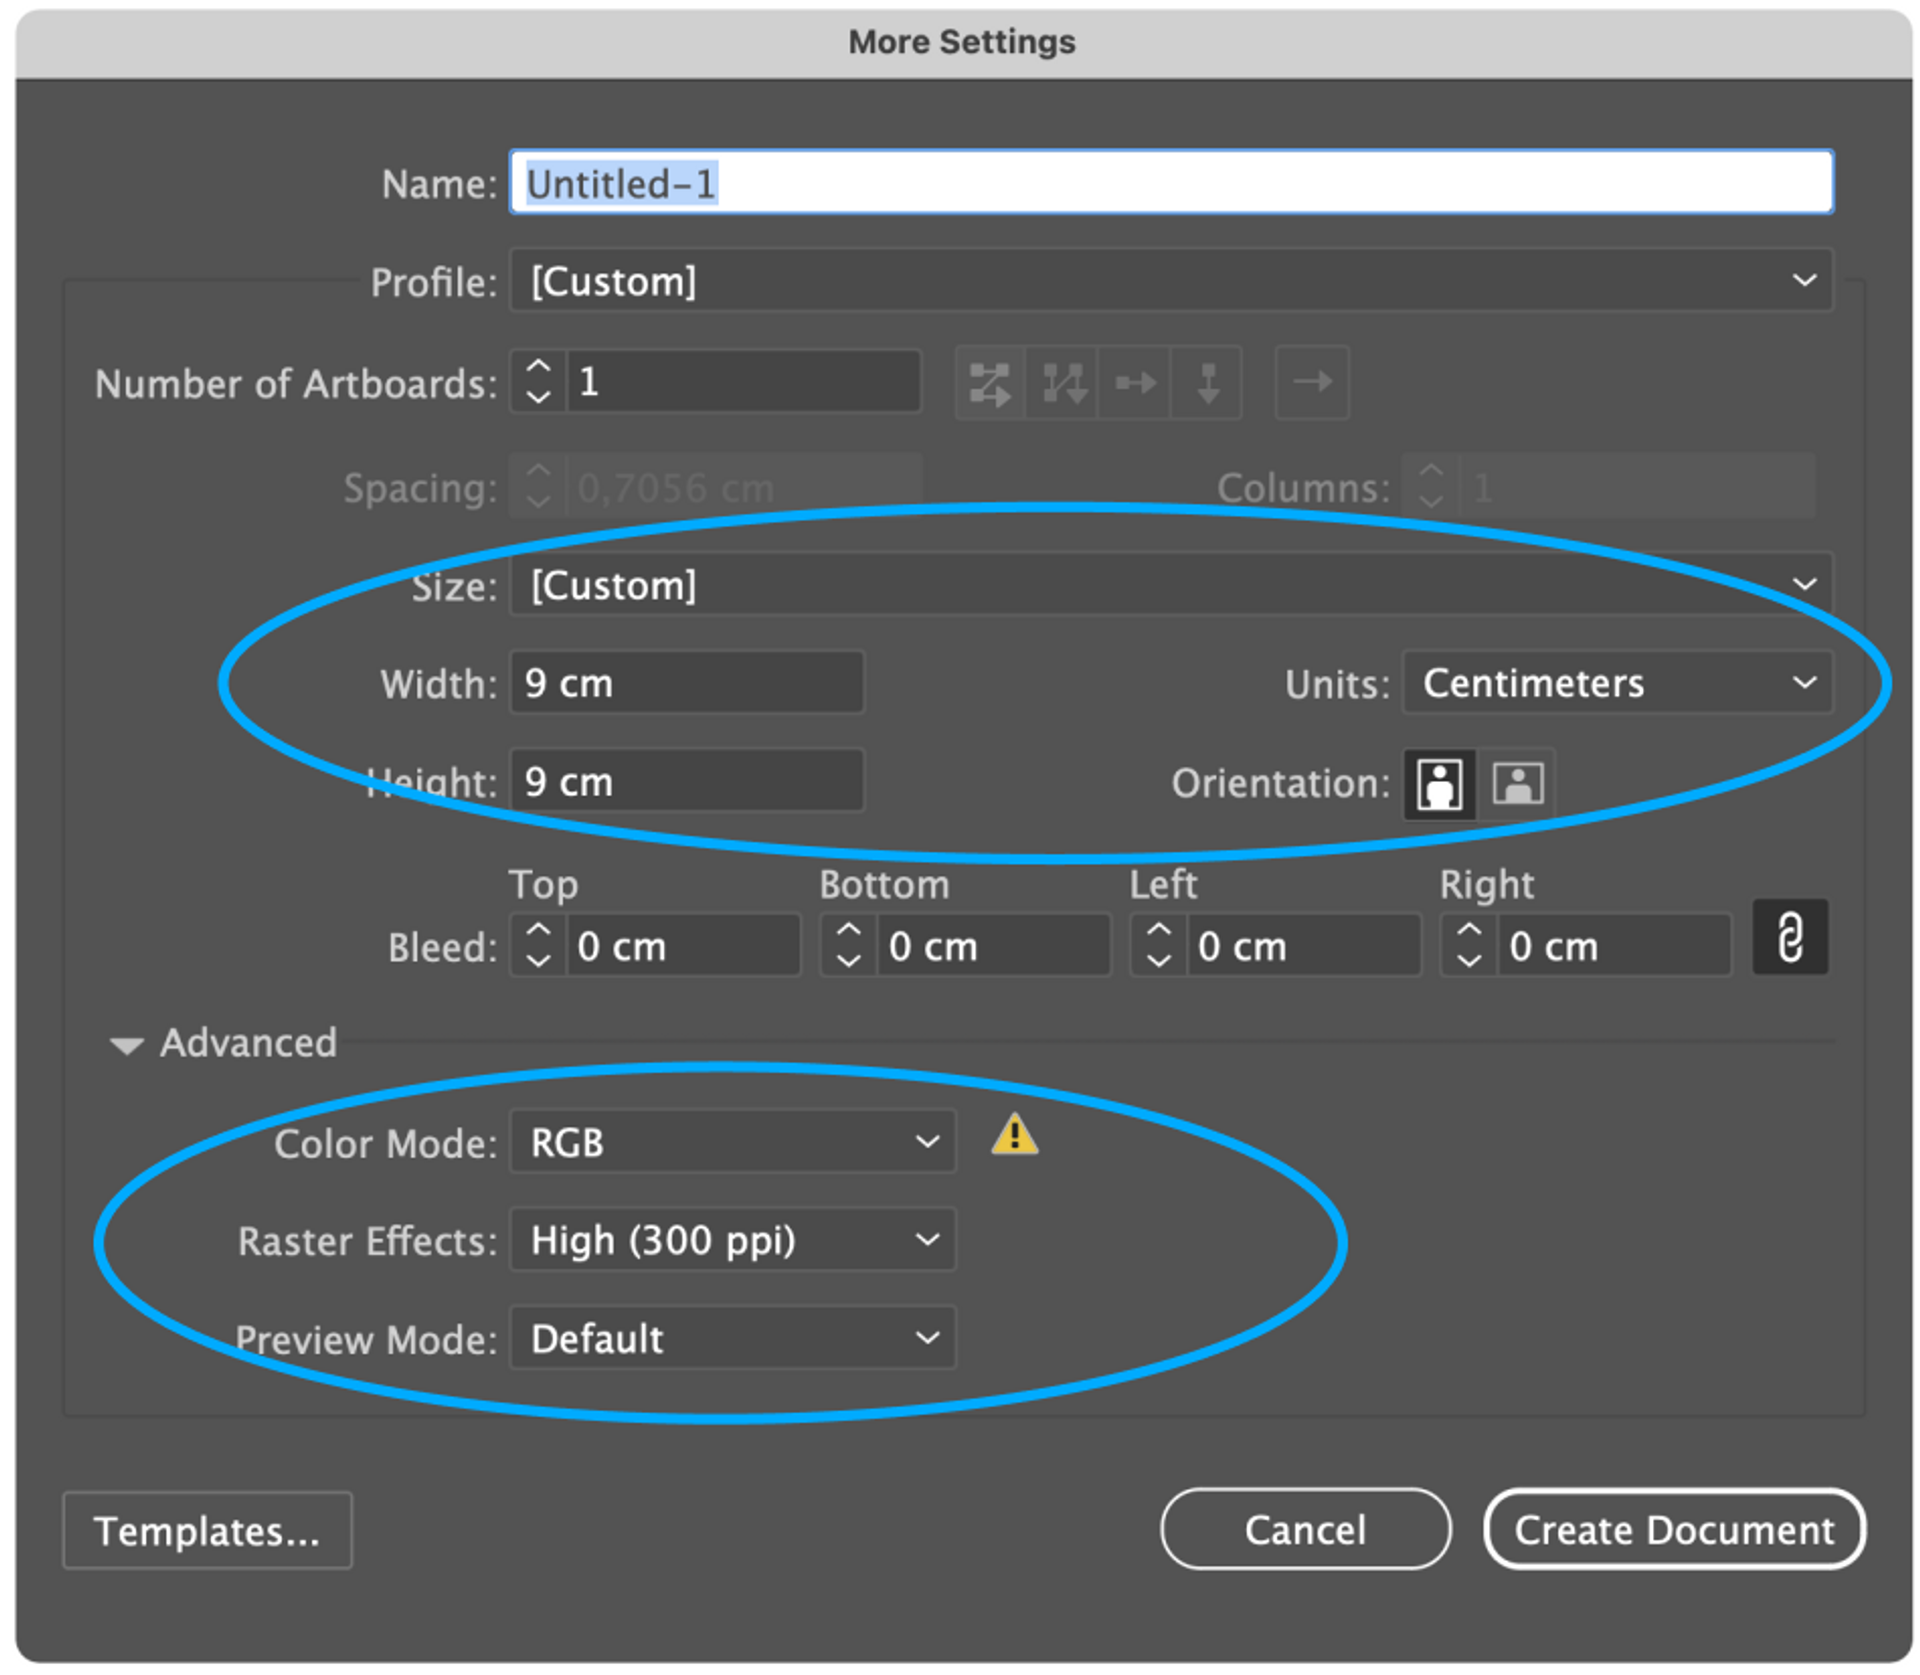
To begin, create a new document in Adobe Illustrator that is 6x3cm, with the colour mode RGB and 300 dpi resolution.
ARTBOARD 9X9CM
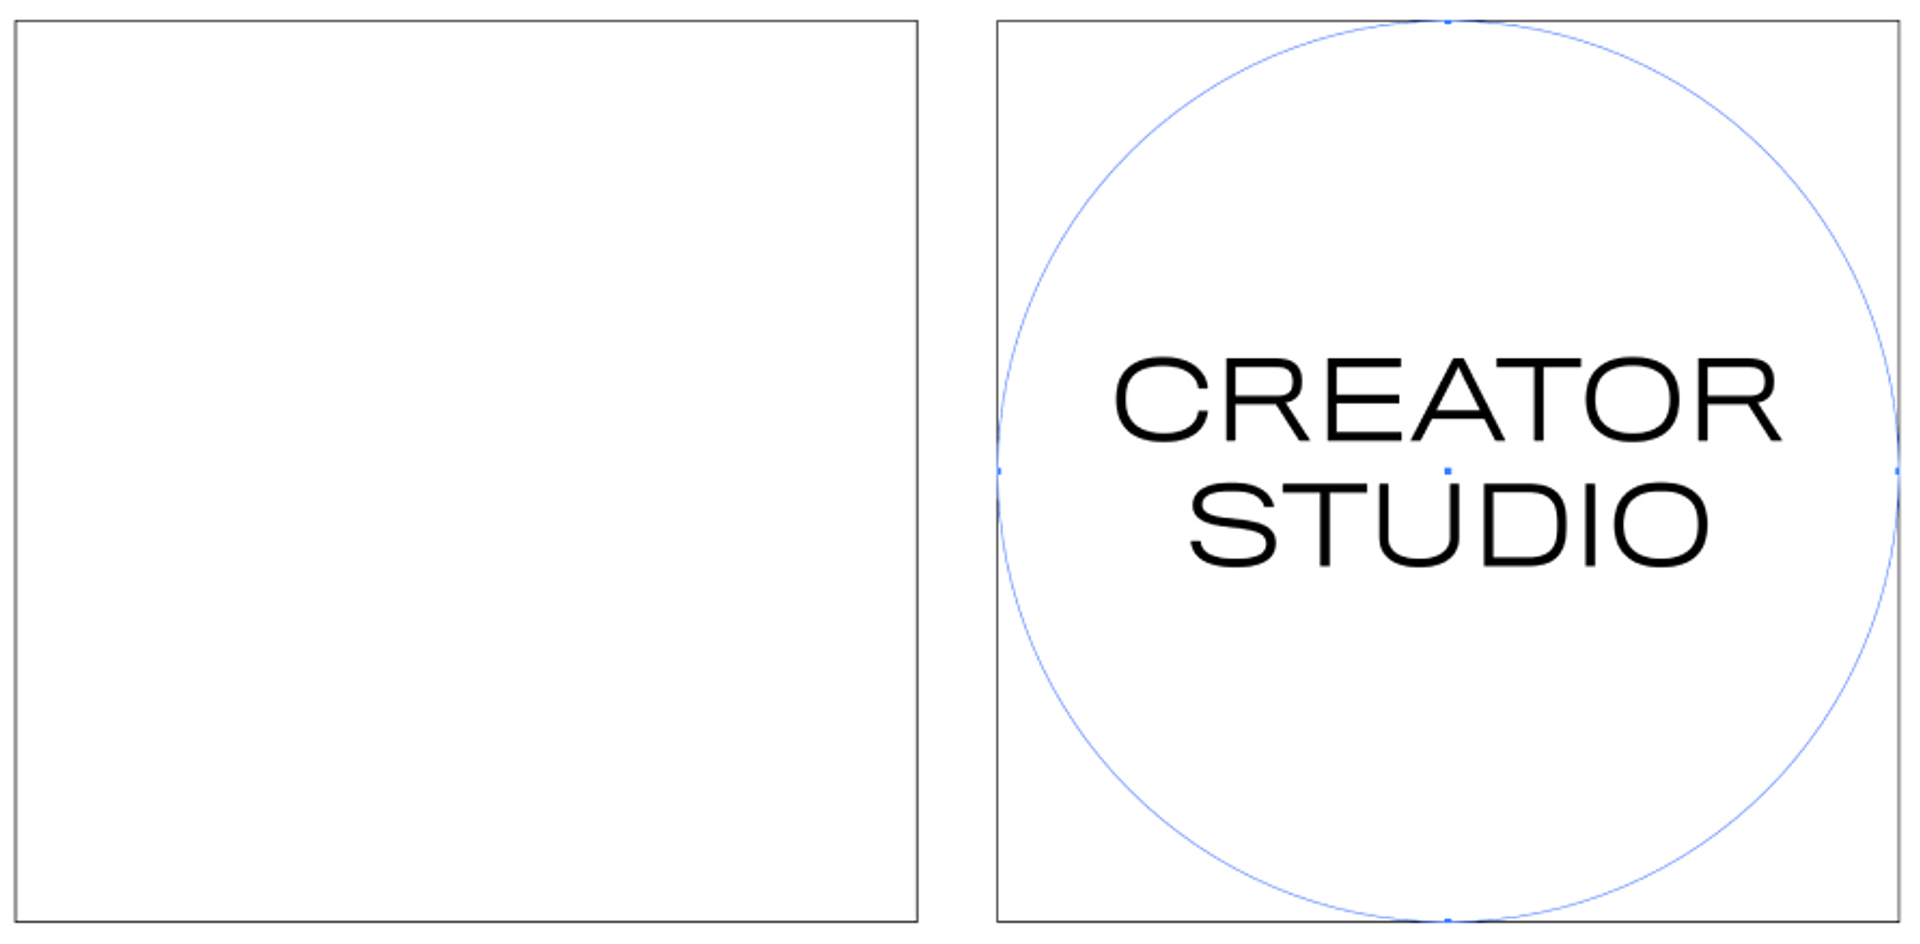
First thing is to draw a circle base to place your artwork on. Make sure it is 9x9cm, positioned centrally and then place your artwork on your new circle.
IMPORTANT
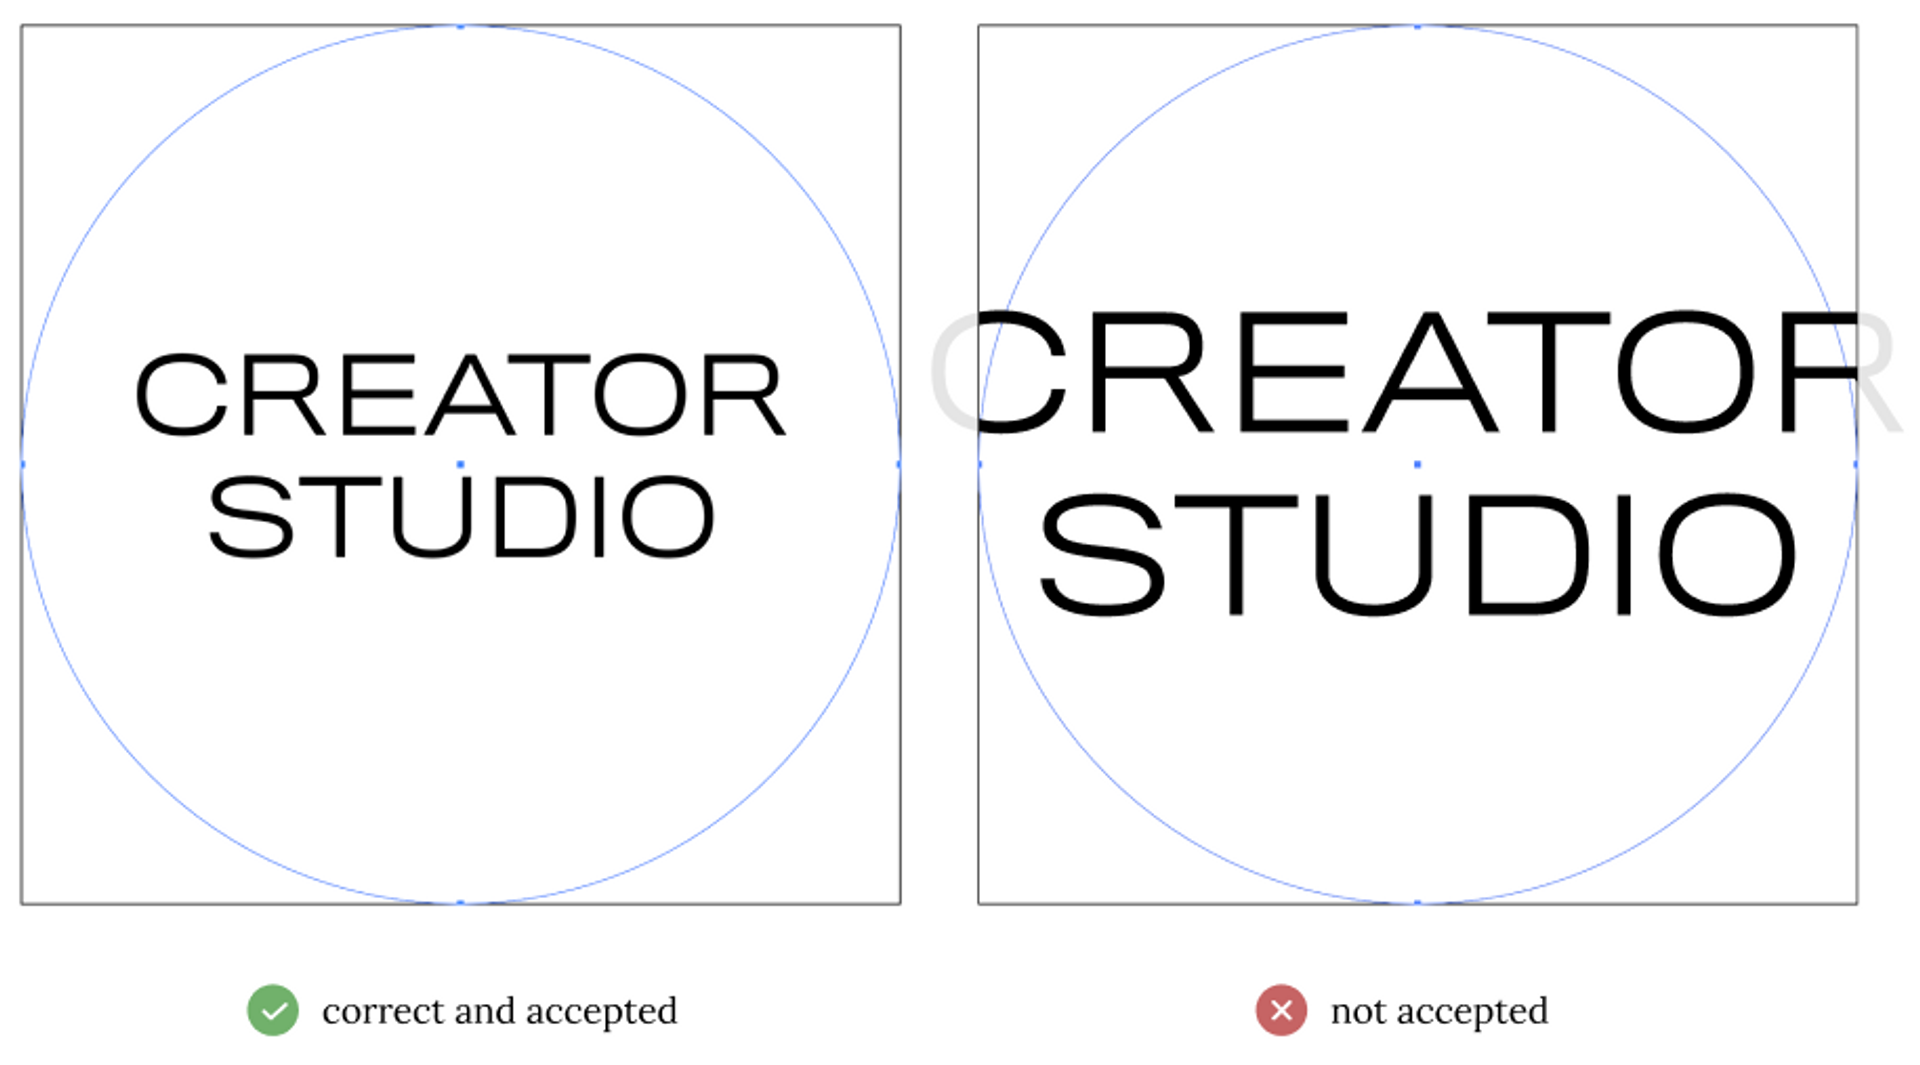
Make sure that your design fits within the circle and does not go outside the artboard.
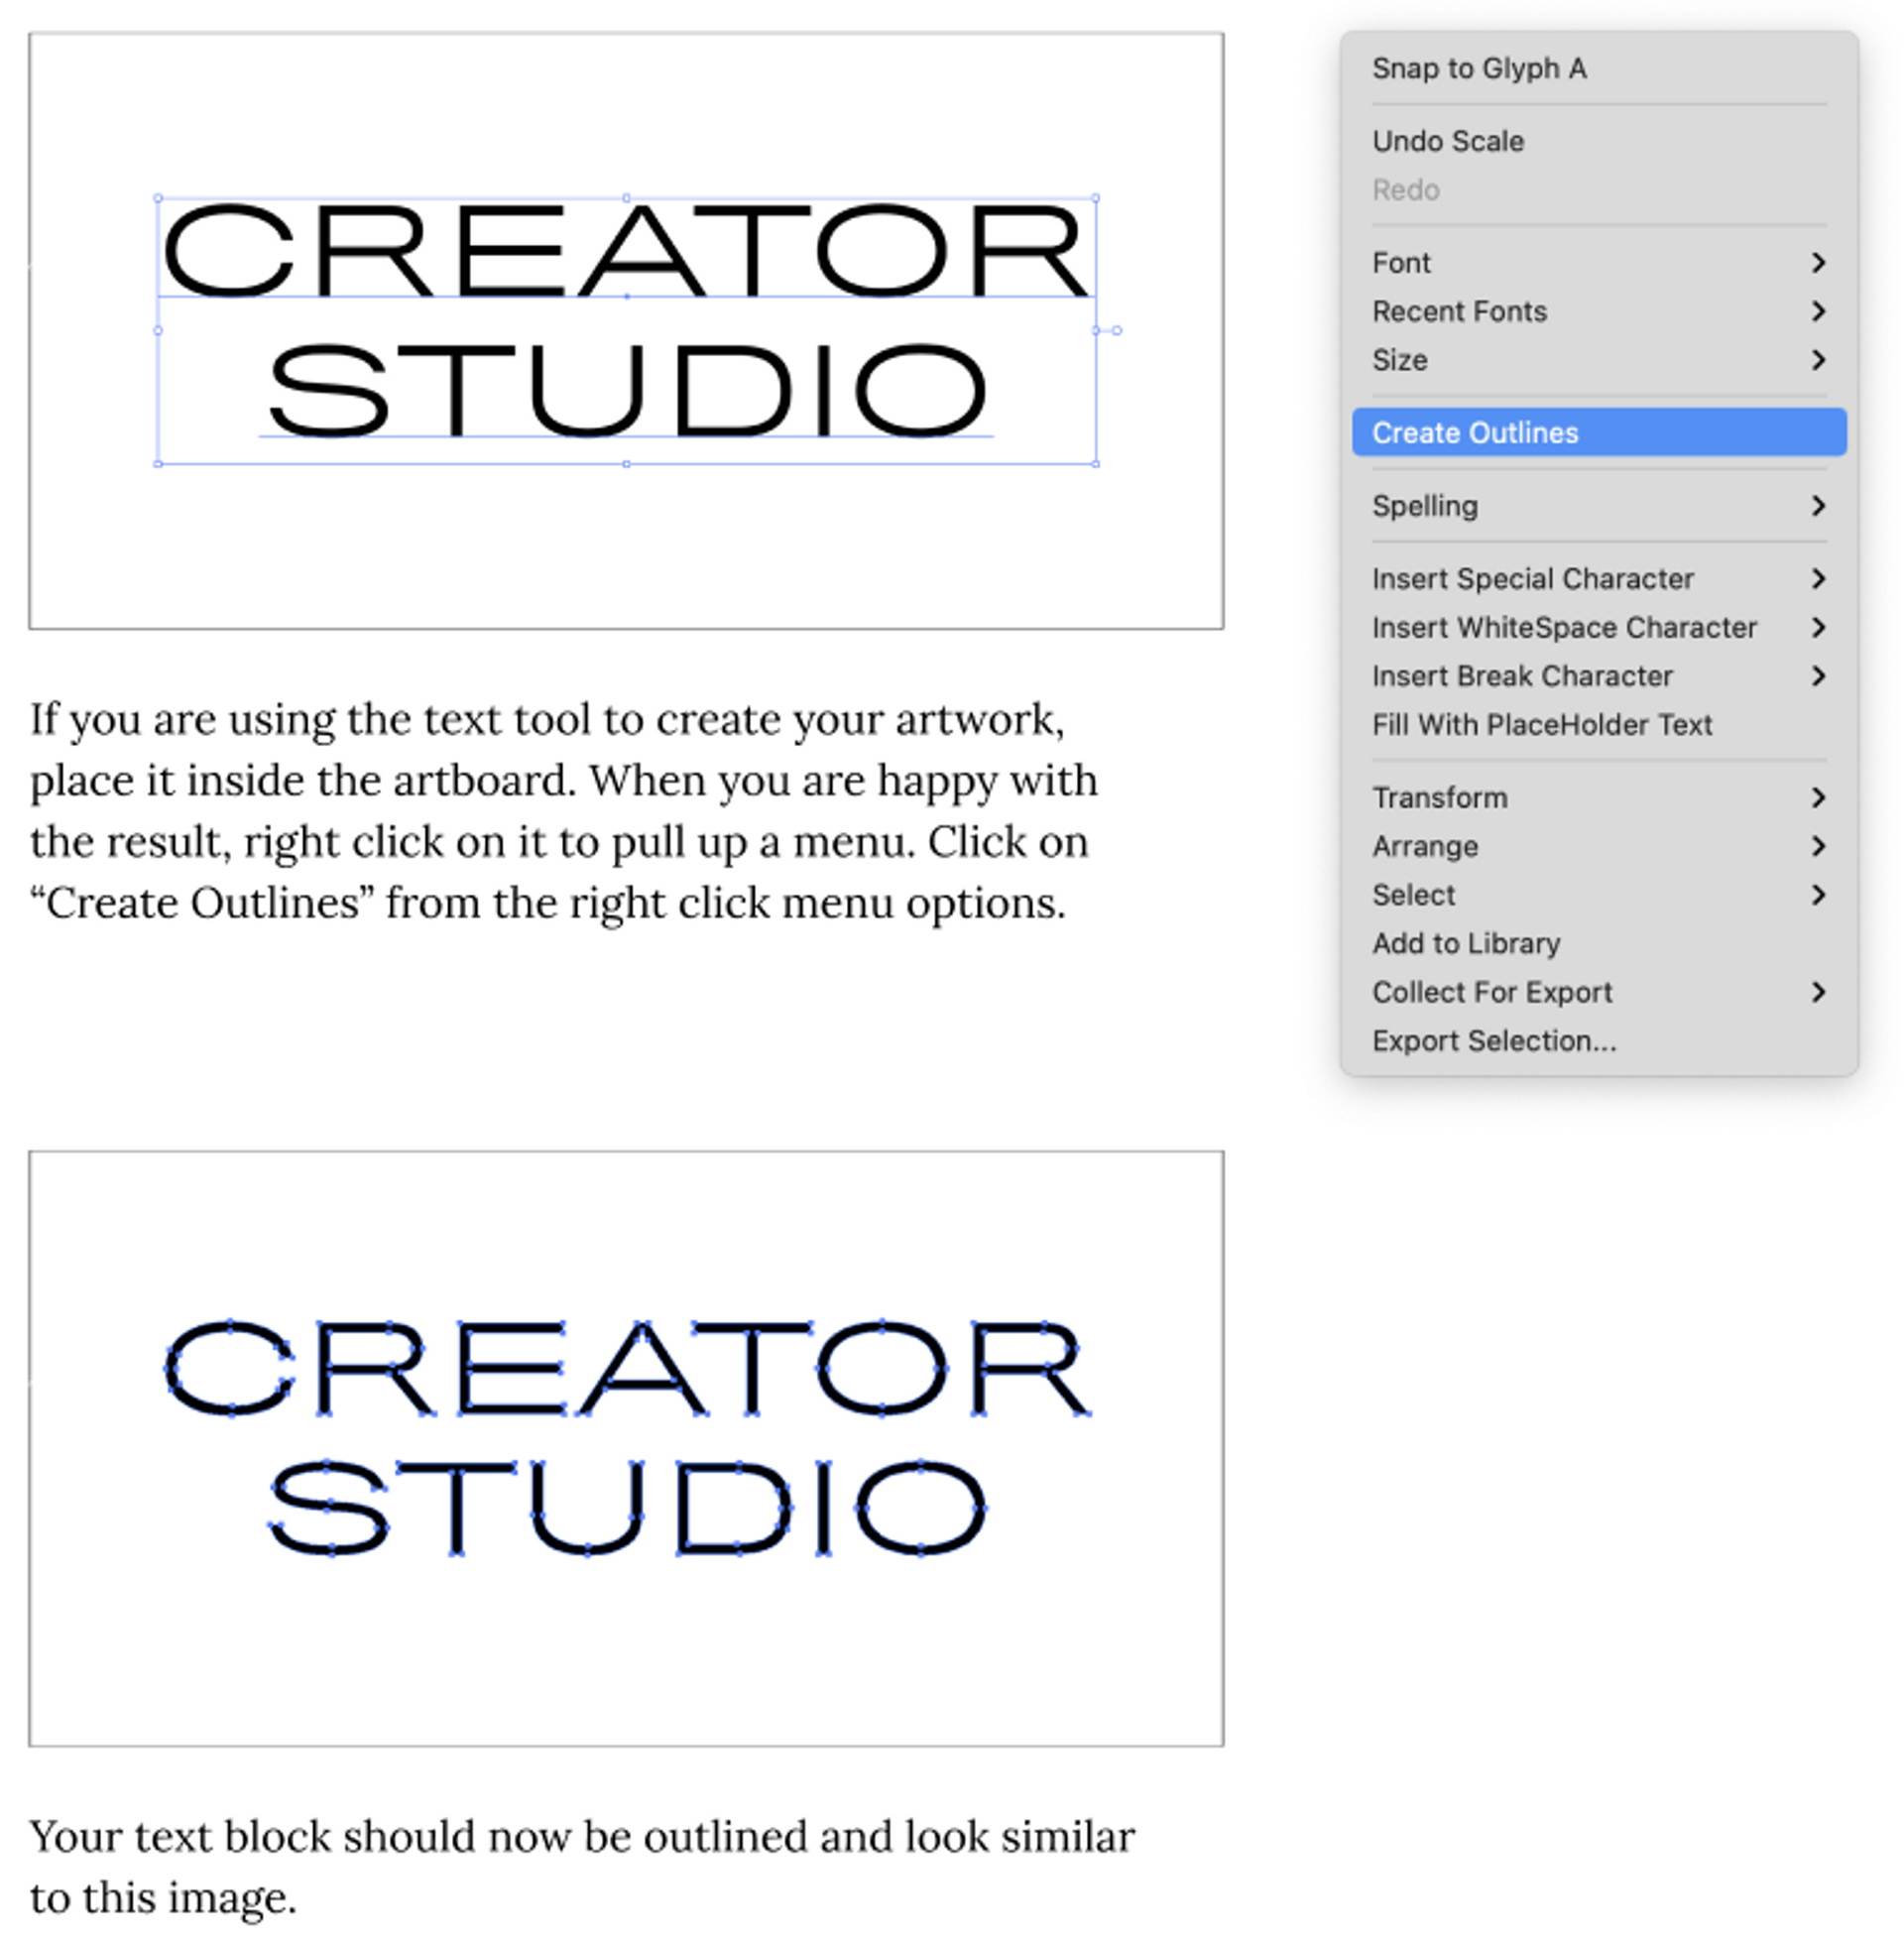
CONVERT TEXT TO OUTLINES
SAVE YOUR DOCUMENT
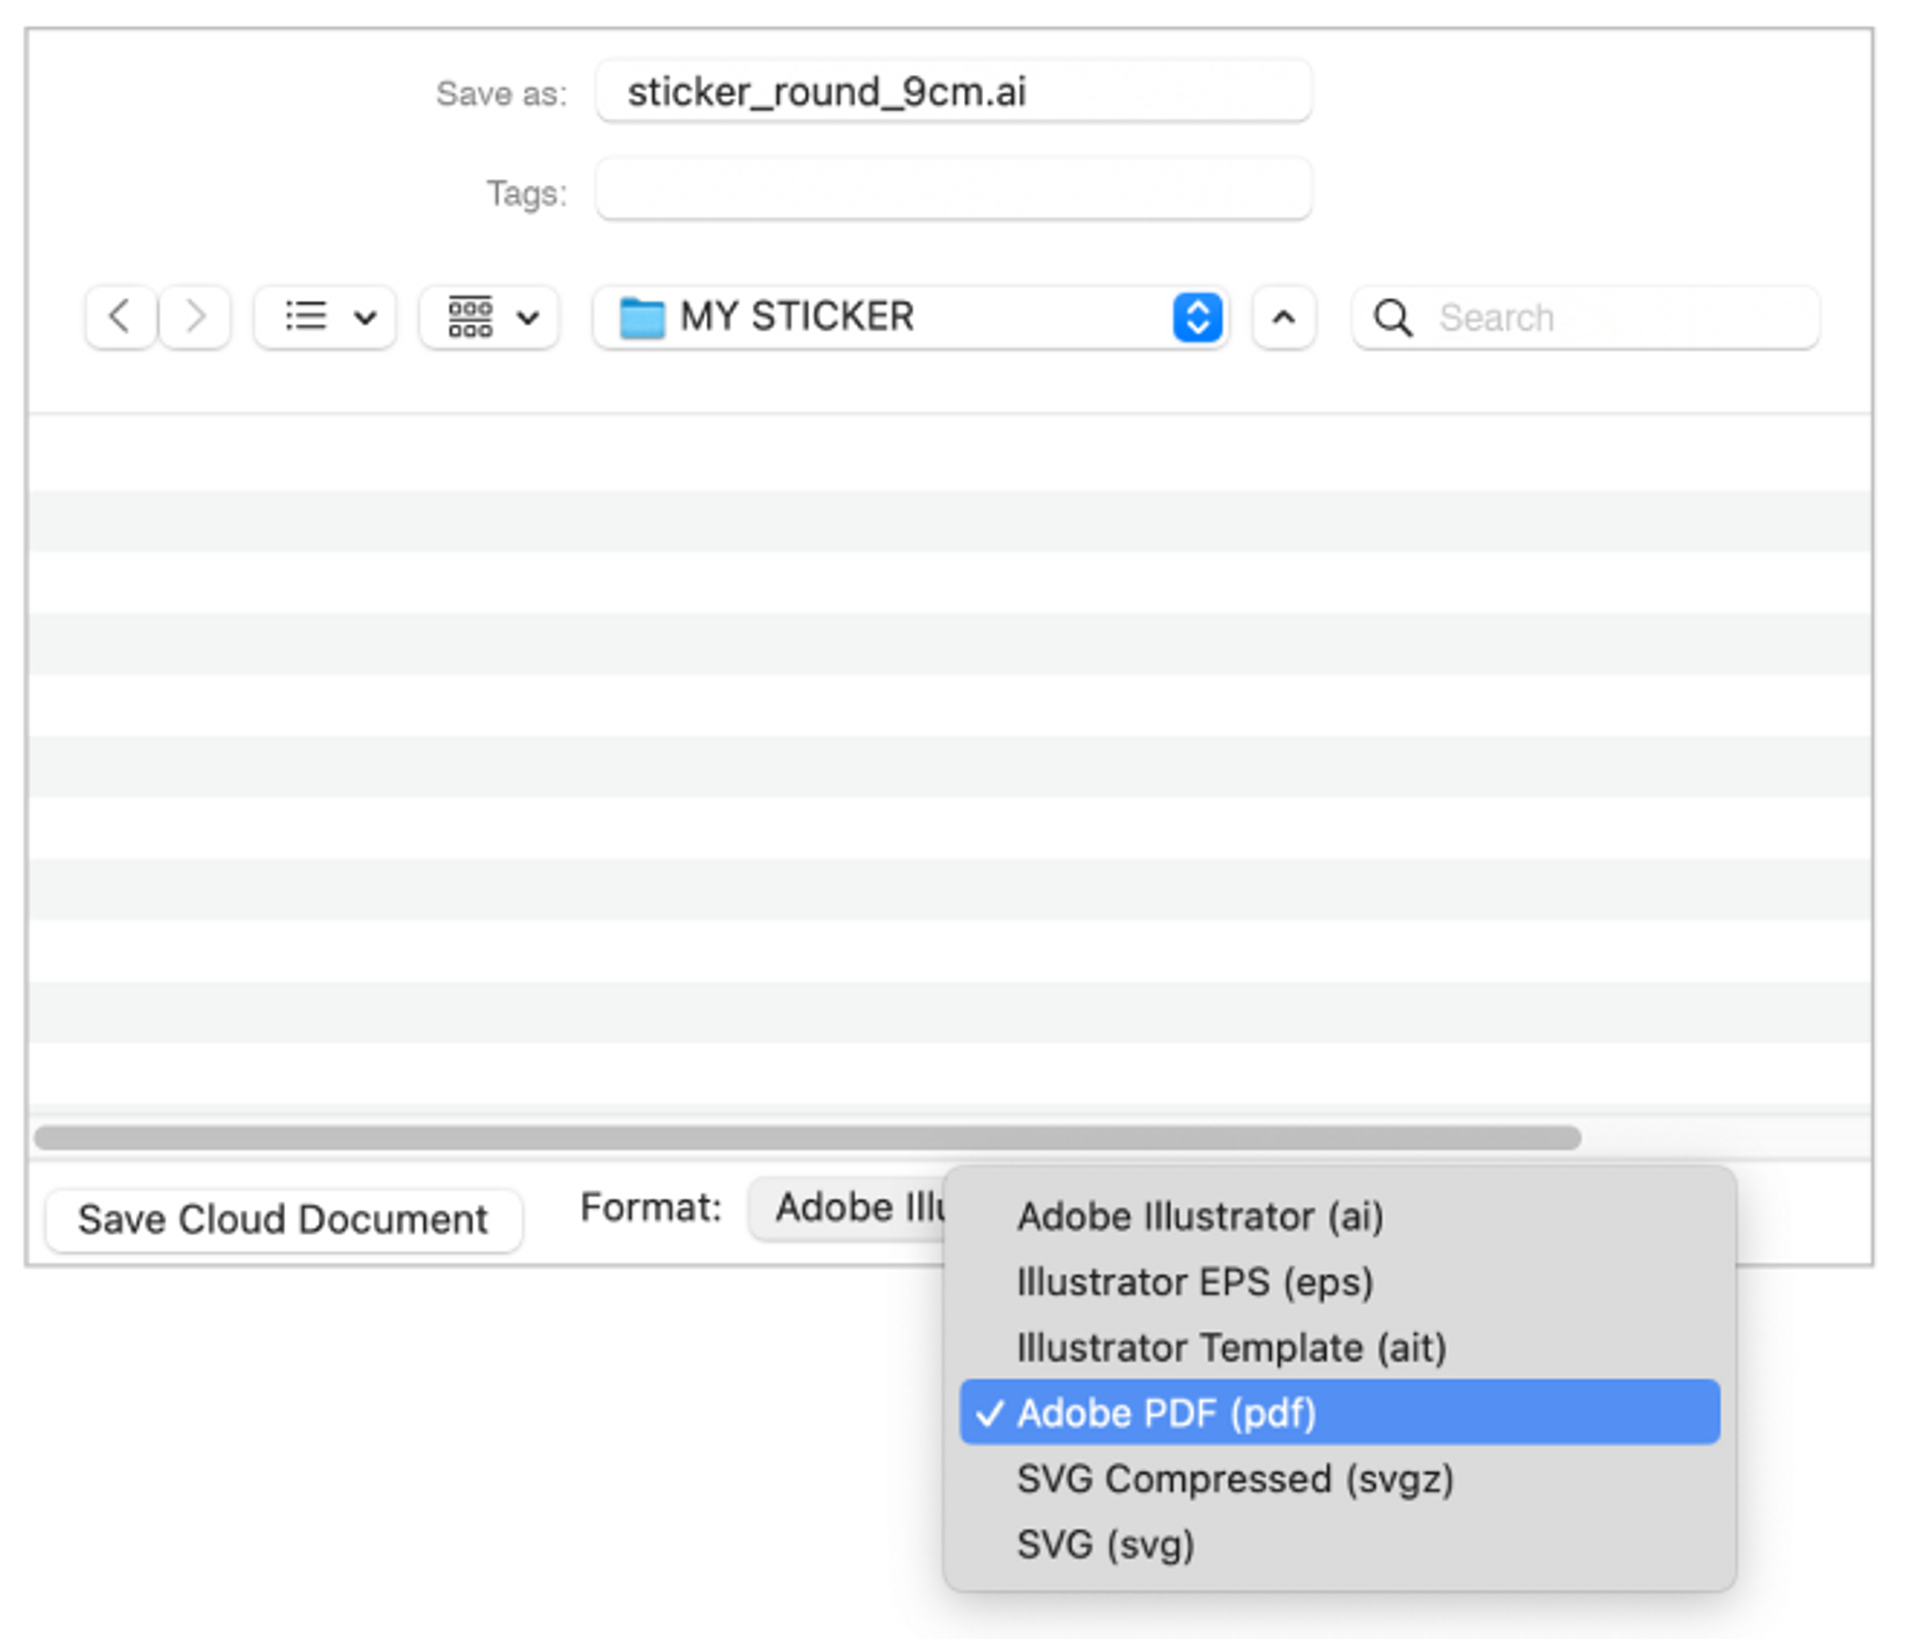
Save your document as a PDF file and you’re ready to import it into MyStudio as your custom sticker.
was this helpful?
related articles

© Creator Studio 2025 - Part of H&M Group
106 38 Stockholm, Sweden